
First tip is organize your notebook.
Organizing your OneNote notebook is a great way to keep your thoughts and projects in order. Here’s how you can do it effectively:
To start organizing, create new sections for different topics or projects. Simply go to the top of your OneNote window where the section tabs are located. Click the plus sign (+) to add a new section, and type in the name of your new section. If your sections are displayed on the left, you can also right-click there to create a new section.
Once you have your sections set up, you can move pages to the appropriate section. Go to the section where the pages are currently located. Select the pages you want to move by clicking on one, then shift-clicking or control-clicking to select multiple pages. Drag the selected pages to the new section tab.
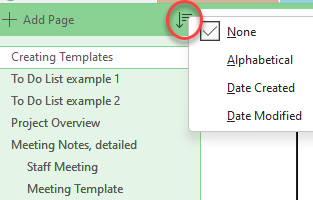
After moving your pages, you can sort them by different criteria to keep everything neat and accessible. This might involve arranging them by date, topic, or priority.
By following these steps, you can ensure your OneNote notebook is well-organized and easy to navigate.
Our next tip on Microsoft OneNote is how to customize your page layouts.
Customizing your OneNote page layouts can make your notes more visually appealing and organized. Here’s how you can do it:
To change the color of your OneNote pages, follow these steps:
This can help maintain consistency across different pages, like using the same color for all social media-related notes.
Another way to customize your page layout is by adding lines or grids:
This feature is particularly useful if you’re drawing or using handwriting on your pages.
I’m gonna talk to you about how you can use OneNote for handwritten notes or your drawings.
OneNote offers a fantastic way to incorporate handwritten notes and drawings into your digital notebooks. Here’s how you can make the most of these features:
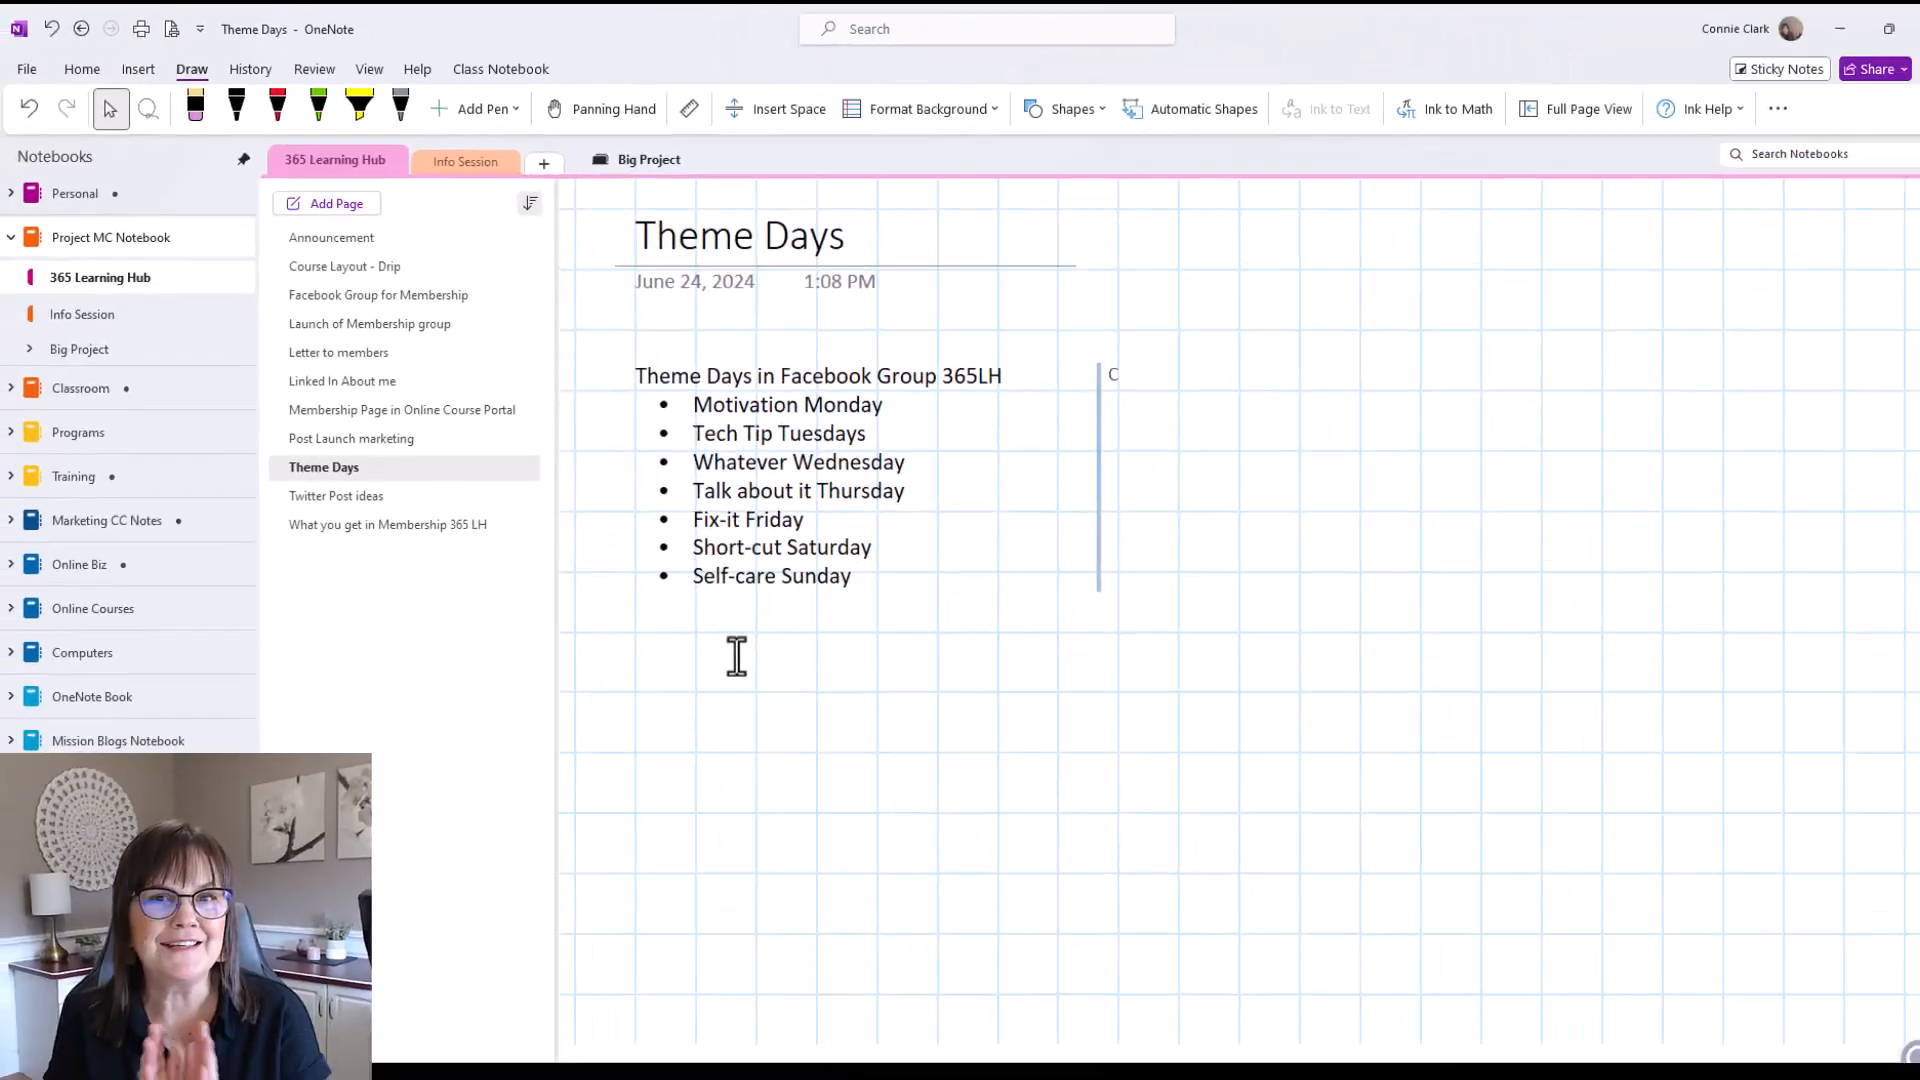
To start, add a new page in your OneNote notebook where you can create your drawings. This dedicated space will help you keep your notes organized.
Utilize the “Format Background” option to apply a grid to your page. This grid will assist you in aligning your drawings and notes neatly. Once the grid is set, head over to the “Draw” toolbar, select a color, and begin writing or drawing.
One of the standout features of OneNote is its ability to convert handwriting to text. Here’s how you can do it:
This feature is particularly useful if you’re using a tablet or smartphone, but it works on computers too. While the conversion might not always be perfect, it’s a handy tool for digitizing your handwritten notes.
The next example I wanna show you is how to use OneNote to extract text from pictures.
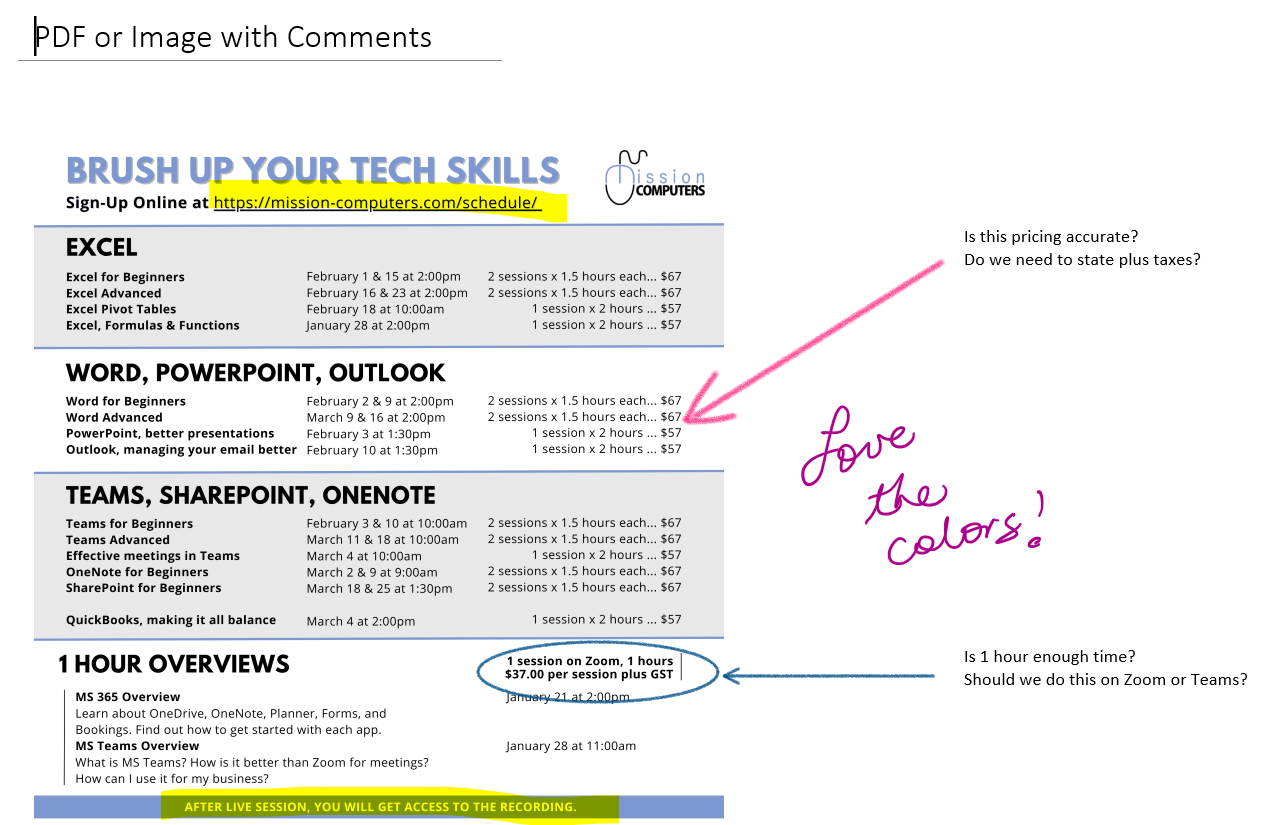
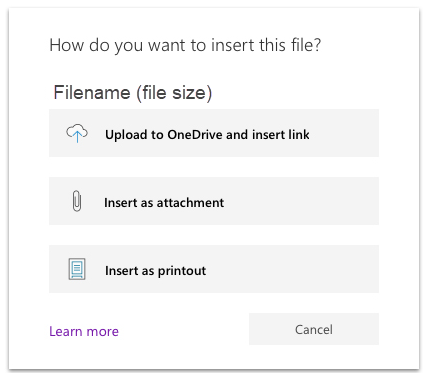
Extracting text from images and PDFs in OneNote is a handy feature that can save you time and effort. Here’s how you can do it:
This method allows you to easily extract and use text from any image you have.
This quick method is perfect for extracting text from PDFs, allowing you to work with the text as needed.
By following these steps, you can efficiently extract and utilize text from images and PDFs in OneNote.
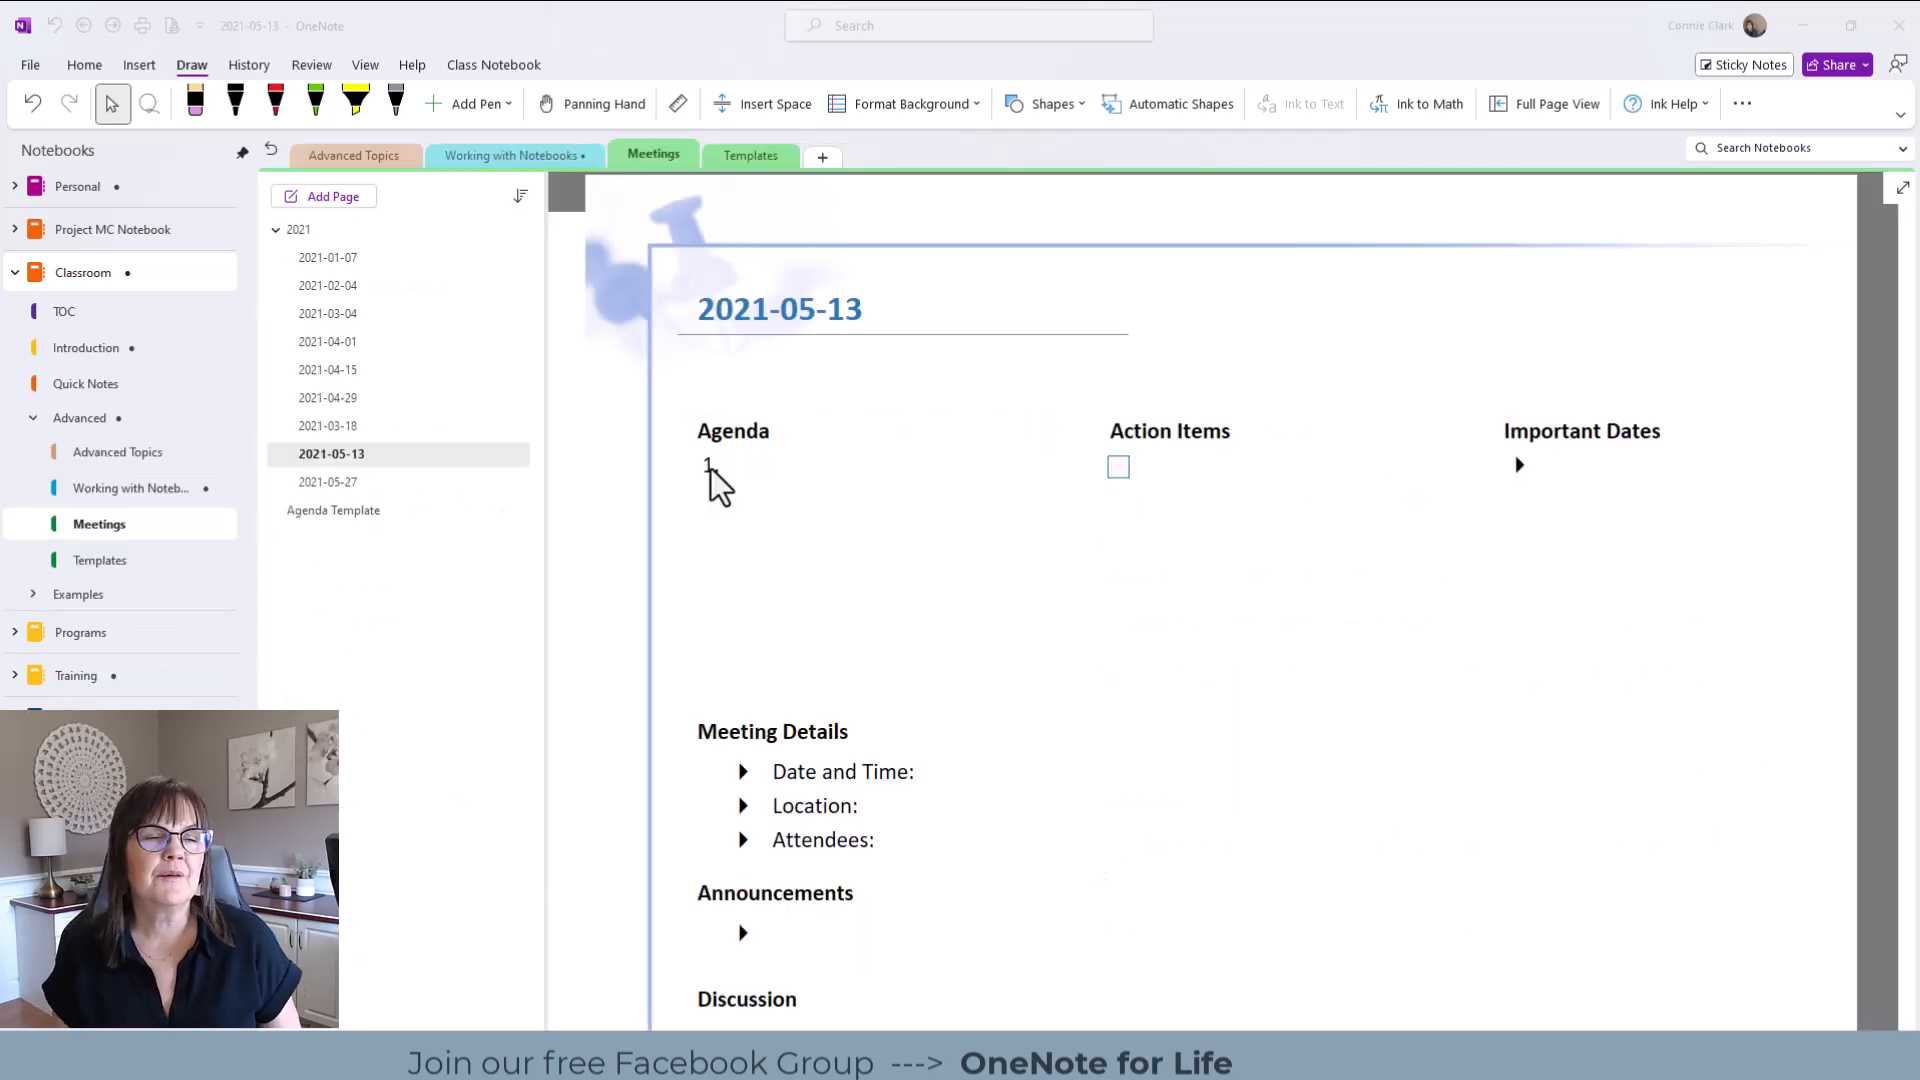
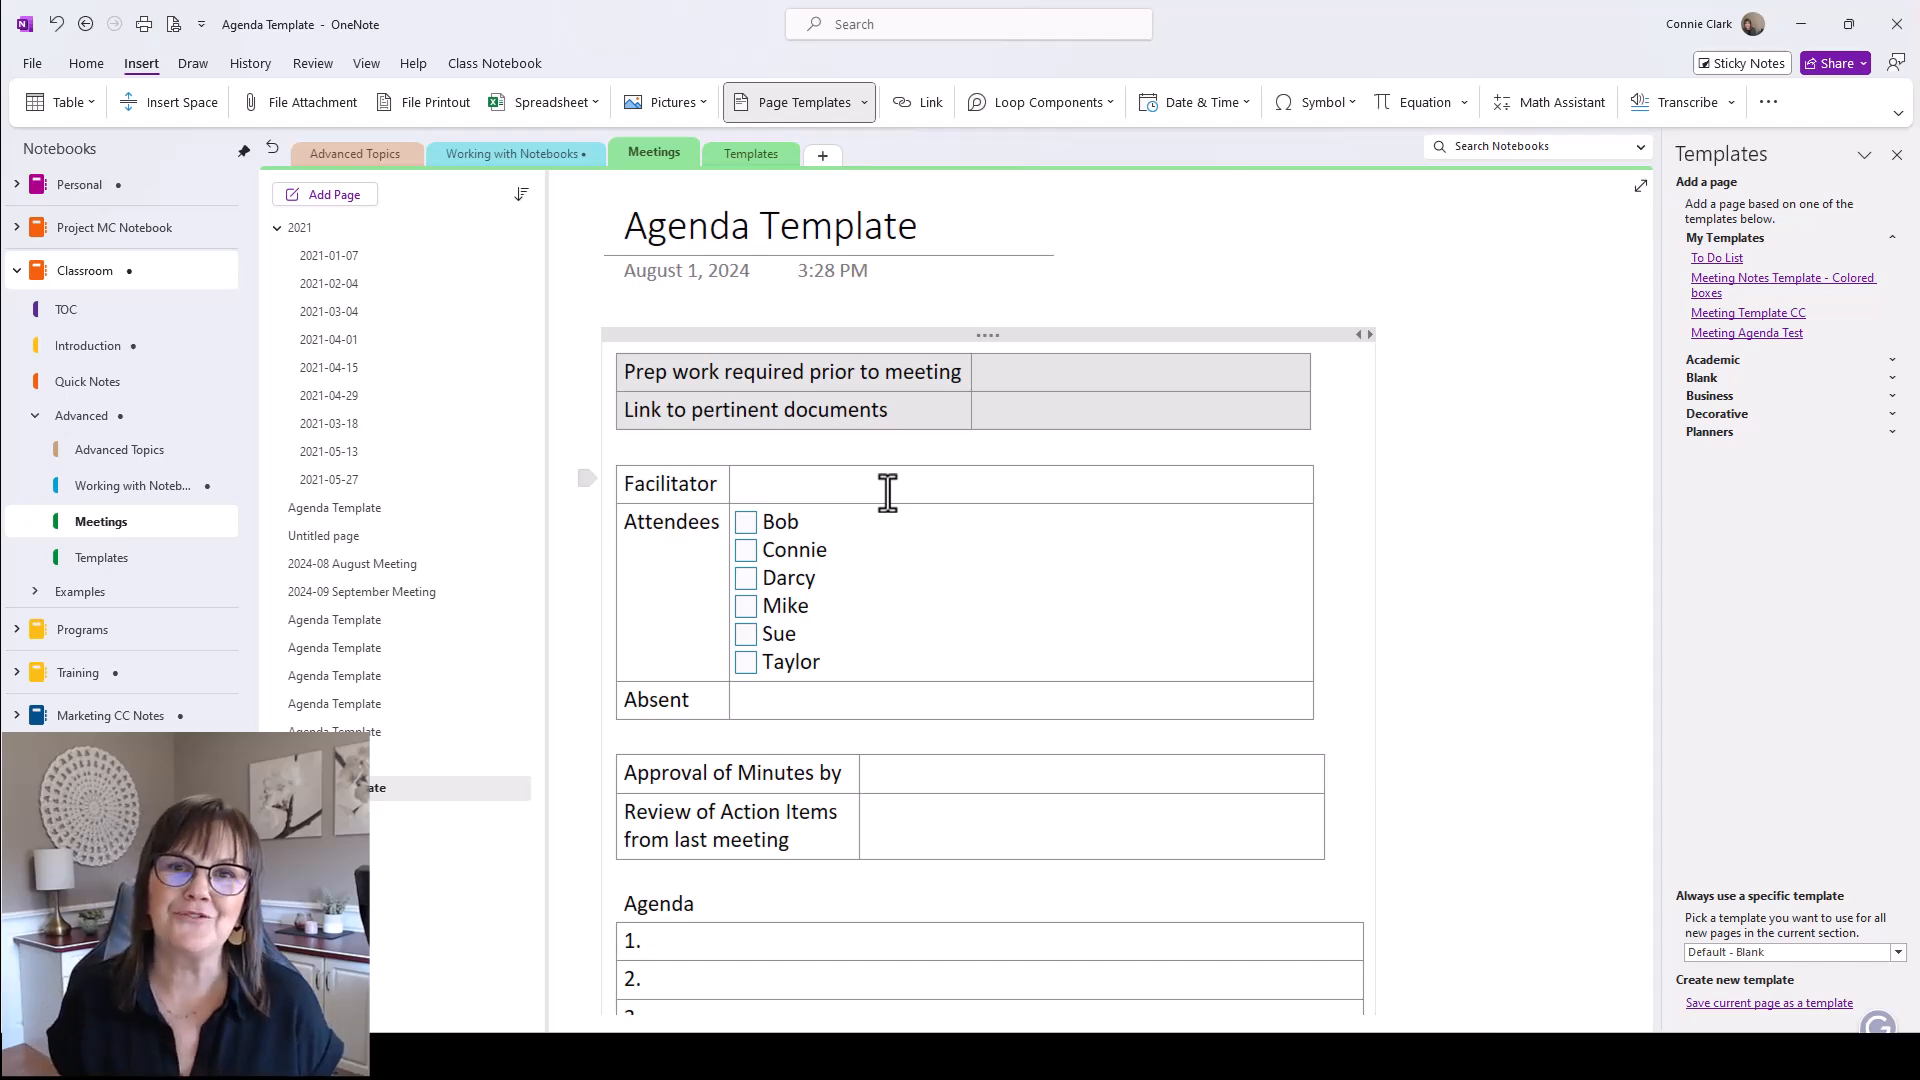
My next tip is all about how to save time with templates in Microsoft OneNote.
Using templates in Microsoft OneNote can significantly streamline your workflow. Here’s how you can make the most of both built-in and custom templates.
By utilizing templates, you can avoid repetitive tasks like retyping or copying and pasting. Make use of the built-in templates or create your own to suit your needs.
Creating tables in OneNote is a straightforward process that can greatly enhance your note-taking and organization. Here’s how you can create and use tables effectively:
To insert a table, navigate to the Insert menu and select Table. You can choose the number of rows and columns you need. Once inserted, you can start typing directly into the cells. Use the Tab key to move between cells and create new columns, and the Enter key to add new rows.
So let’s talk about how easy it is for you to make a table within OneNote.
Once your table is created, you can easily add more rows and columns. Click on the table to access the table menu at the top, where you can insert rows and columns in any direction. You can also apply color shading to specific rows for better visual distinction.
Tables are excellent for organizing information and aligning elements like pictures. You can drag images into table cells to keep them neatly aligned. If you prefer a cleaner look, you can hide the table borders.
I like using tables with pictures because it helps line up my pictures.
Additionally, you can add tags, such as to-do checkboxes, within table cells to keep track of tasks. Sorting options are also available to organize your data by different columns.
Your next tip is to try out the audio files or even the dictate.
OneNote offers powerful audio and dictation features that can enhance your note-taking experience. Here’s how you can make the most of these tools:
To record audio notes, navigate to the Home ribbon and select Transcribe. From there, you can choose to record audio. This feature is accessible from any device, allowing you to replay the audio by simply double-clicking on it.
Dictate is a convenient tool located right next to the transcribe button. It allows you to speak directly to OneNote, which then converts your speech into text, saving you from typing. To use it, click on the Dictate button to turn it on. You can add punctuation by saying commands like “period” or “new line” to format your text.
If you need to stop dictation, click the Dictate button again. While some editing, like backspacing, might need to be done manually, dictation can significantly speed up your workflow.
Organizing your notes in OneNote can be a breeze with the use of tags. Tags help you categorize and prioritize your content, making it easier to find and manage. Here’s how you can leverage tags effectively:
A very valuable tag you may want to use is the to-do tag. This tag allows you to check off tasks as you complete them. For instance, if you’re managing a list of Twitter posts, you can highlight all the posts, go to the tags in the home ribbon, and choose the to-do tag. This action places a checkbox in front of each item, enabling you to quickly see which posts have been used and which are pending.
And a very valuable tag that you may wanna use is the to do tag so you can check something off.
OneNote offers a variety of tags such as important and question. You can also create custom tags to suit your needs, like a “social media post” tag. To apply a tag, simply click on a line and select the desired tag from the menu. You can even use keyboard shortcuts, like Control + 2, to apply tags quickly.
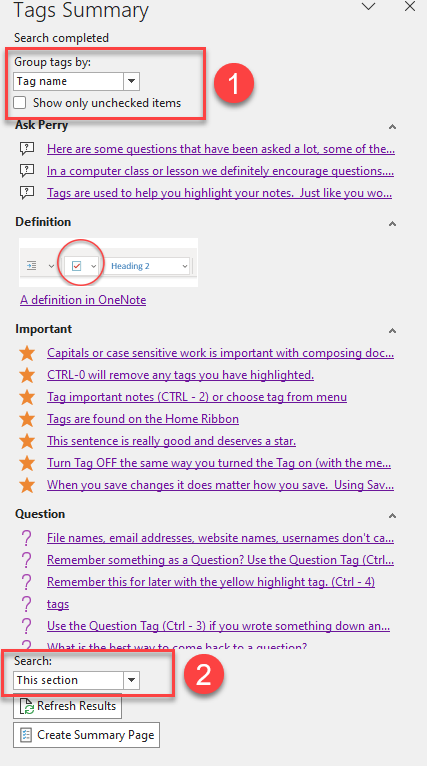
Tags not only help in organizing but also make searching for specific notes easier. You can search for all notes with a particular tag, allowing you to quickly locate important information.
Searching effectively in OneNote can greatly enhance your productivity. Here’s how you can master the search functionality:
Now your next tip is to make sure you take advantage of search, and you can search for words or phrases, or you could search for the tags that you just used.
To search for specific words or phrases, use the search bar located at the top right of your OneNote interface. Simply type in the word or phrase you’re looking for. For example, typing “overwhelm” will show you all instances of this word across your notebooks. You can refine your search to a specific notebook by selecting “This Notebook” instead of “All Notebooks,” which helps narrow down the results.
OneNote’s search feature also extends to text within images. If you have images with text, OneNote can identify and highlight these words. This is particularly useful for finding information in scanned documents or photos.
Tags are a powerful way to organize your notes, and searching by tags can be very efficient. Next to the tags button, there’s a magnifying glass icon that allows you to search for tags. You can view a summary of tags and choose to search within a specific section or the entire notebook. This feature helps you quickly locate important notes or tasks marked with specific tags.
By mastering these search techniques, you can efficiently navigate through your OneNote notebooks and find the information you need quickly.
Creating a table of contents in OneNote can greatly enhance your ability to navigate through your notes efficiently. Here’s a friendly guide on how to set it up and use it effectively.
To start, create a dedicated section in your OneNote notebook for your table of contents (TOC). This section will serve as a hub for all your links to various pages and sections within your notebook.
You can link to specific pages, sections, or even different notebooks. For instance, if you have a page titled “Level One Training,” you can create a link that jumps directly to that page. Simply right-click on the page or section you want to link to, select “Copy Link to Page,” and paste it into your TOC.
Once your TOC is set up, you can easily jump between different parts of your notebook. For example, clicking on a link labeled “Handwriting” can take you directly to a page dedicated to handwriting notes. This feature allows you to navigate not only within the same section but also across different sections or even different notebooks.
You can also link to specific paragraphs within a page. Right-click on the desired heading, select “Copy Link to Paragraph,” and paste it into your TOC. This way, clicking the link will take you directly to that paragraph, enhancing your navigation experience.
For my final tip, I wanna show you how a table of contents could look in your OneNote notebook.
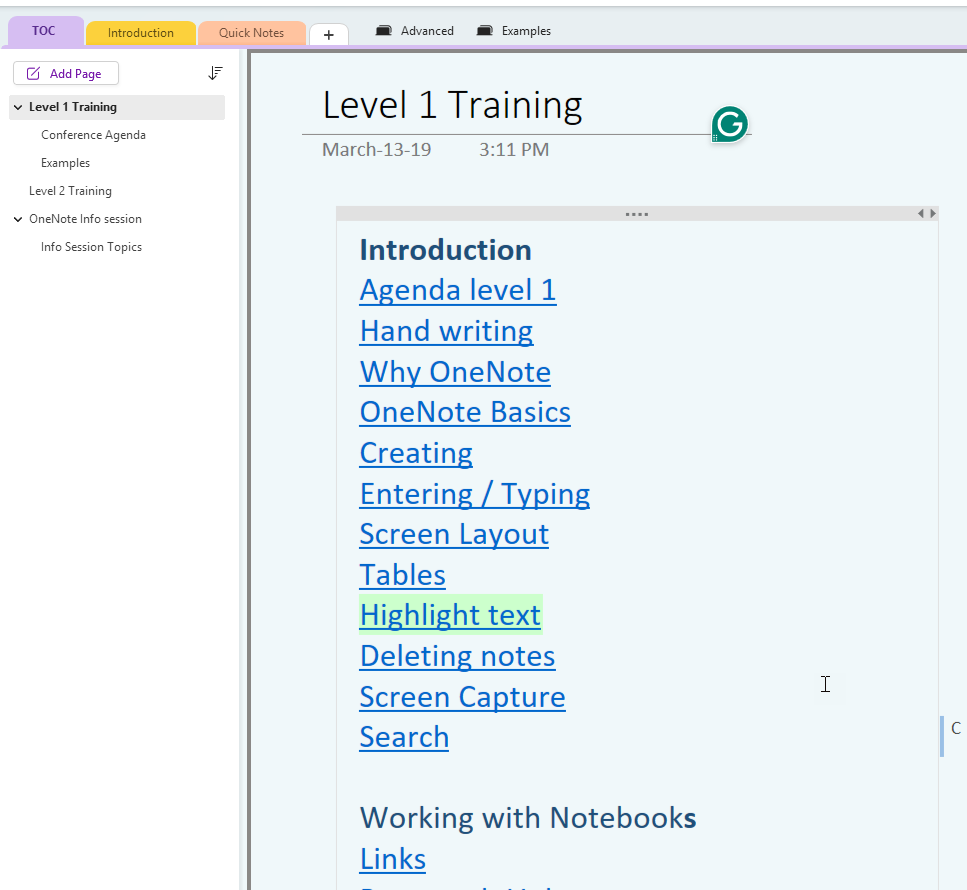
By using a table of contents, you can streamline your workflow and make your OneNote experience more organized and efficient. Enjoy exploring your notes with ease!
Mastering the various features of Microsoft OneNote—from organizing notebooks and customizing layouts, to using tags for better organization—empowers you with improved productivity and seamless navigation through all kinds of information. These tips not only enhance how effectively you manage notes but also boost overall efficiency in both personal and professional settings.
