Do you ever feel like you struggle to find information enough when you are ‘out and about’…
You are at the grocery store and you can’t find that list you made earlier in the day…
You pass by the bookstore and decide to find that book someone mentioned but you can’t find the note you wrote it on..
Your wife / husband / friend / daughter / son tells you about their favorite gift of all time and you want to capture so you have it ready for their next birthday. Trouble is by the time the birthday rolls around, you don’t know where you put that great idea!
You’re on your first day of holidays and discover all the things you forgot to pack so you vow not to make that mistake next time…
I love to stay organized.
And I want access to information, no matter where I am…
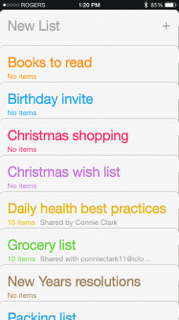
I want to introduce you to REMINDERS on the iPhone.
The name ‘Reminders’ actually isn’t very accurate because you might of thought it was only for those reminders that have alarms attached to them (with a date and a time).
But Reminders is so powerful as a LIST system.
You can make as many lists as you wish.
And you can Share these lists with whomever you want (that also has an iPhone).
My Example here is the Grocery List.
I have searched through the APP store many times to find that perfect grocery list app. I downloaded a few and tried them for a while…
But I have found that the REMINDERS List on the iPhone has everything I need for a Grocery list.
- I can share that list with my family.
- Anyone of us can update the list.
- We can use the list over and over again.
- We can order the list alphabetically or by ‘isle’ of the grocery store
To use Reminders you have have the List belong to your iCloud Account or any other email account on your phone that accepts a task list (eg. Outlook Exchange account).
- Find the Reminders App on your iPhone
- Choose New List or Tap on + (plus Sign at top right)